Monday, March 26, 2012

Ernst's Book: Pt. 2 - Embroidery

So, now that the text block was assembled and being pressed, with the measurements I took off of it (with the book board thickness included in that), it was time to start the embroidery.
I bought a half yard of burgandy silk dupioni fabric that had very little slubbing in the weave. Was actually quite pleased with this as I found it at Joanne's and usually their dupioni is pretty slubby.
At the same time I purchased burgandy linen to match. I felt if I embroidered directly onto the silk with nothing behind it, it wouldnt be strong enough and the stitching would pull through or bunch up the fabric showing more of the needle holes.

I used the scroll frame pictured here to do all the embroidery.

Design...let me speak on that for a moment. Other than the "E", I had free reign to do what I wanted. Since I was told this was a gift for someone (and I still do not know who), I wanted to make the design so that it was appropriate for either a male or female. I did a lot of searching online at medieval embroidered book covers and found a lot of resources and images. This database from The British Library was exceptionally helpful:

This 16th century binding was a big inspiration for me:

I decided that tudor roses would be appropriate for either gender and to throw in a little bit of myself into it, I added a grape cluster and ivy. If you know me, you know I love grapes. :D

With a tape measure and the measurements from the text block, I measured out the spacing for the embroidery for front, back and spine of the book. Then with a ruler and a fabric pencil, I drew in the outline of the book cover and then started sketching the design.

Then I basted the linen to the back of the silk.
This is a close up of the sketching for the front cover with his requested "E" on it.
And of course the back cover.
I began embroidering the "E" as i was still waiting on cards of silk floss to arrive in varying shades of purple for the grapes. I used split stitch to embroider and fill the letter in.
When the purple silks arrived and after the completion of the letter, I began the grapes using three tones of purple for the grapes and two tones for the leaves, again using split stitch. I went with this stitch mostly because a book gets handled quite a bit and the split stitch would be the least snagging and most durable to cover a book, in my opinion and was what is primarily used on covers in history.

The finished grapes now outlined in their gold frame. Then next i framed out the covers and started in on the roses.


Next I began adding ivy work growing from rose to rose.


And here is the completed embroidery. but...in my opinion, it still needed something. Then I figured it out....
SPANGLES!!! :D I discovered I still had a small pouch of gold spangles in my supplies so I "speckled" them around and tacked them down with some silk floss.

Thus completes the embroidery.

Part 3: attaching cover to the text block.


Sunday, March 25, 2012

Ernst's Book - Part 1: Book binding

So, sometime back, around November I was asked to create an embroidered book cover as a commission project for Baron Ernst. I was given the instructions of it had to have an "E" on it and it couldn't be earlier than 13th century.

The supplies used in making this book are:
1/2 yard of silk burgandy dupioni
Silk Splendor twisted floss
1/2 yard of burgandy linen (for backing and strength)
Linen paper (a commercial brand readily available in stationary stores...or Walmart)
Linen thread (for the sewing of the signatures)
Book board
Glue
Decorative end papers
Coats and Clarks burgandy sewing thread
Binding tape

Tools used:
Exacto blade
Cutting pad
Scissors
Sewing needles
Scroll stretcher frame (for embroidery)
Book press
Bone folder
Ruler


Since my book binding experience is limited to soft leather bound books such as very early period styles, I turned to my friend Christine (Lady Markessa de Carvalhal) who is well versed and studied in this area. She was kind enough to instruct me. It was best to start with creating the text block for the book first.


After deciding on a size of 4x6 inches, I began measuring and cutting the pages for the signatures using an exacto knife and a ruler.


Folded the pages in half and made the crease sharp with a bone folder
Each signature is 10 pages and there are 11 signatures total in the book.

Viewed here is one completed signature.
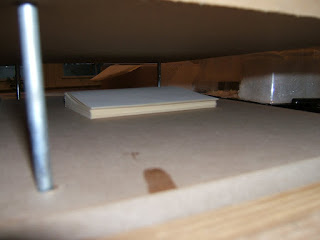
All the signatures completed and together, ready for pressing.

Markessa, who has a wonderful book press made by her husband, placed it within the press and tightened it to get a nice flat text block.


Once out of the press, I could commence with sewing the signatures together. I used a kettle stitch.

When the stitching went over the folded edge of the paper, I stitched over the binding tape. When all signatures were sewn together, I glued down the tape to the outer pages and again, placed in the book press.


Next entry...starting the embroidery.


Friday, March 9, 2012

Another Quicky Project Completed

So sometime ago I started these tippets for myself but they were put on the back burner and never finished.....until today. My first set of tippets: silk velvet and white linen.

I bought the velvet on ebay and there wasnt enough to make the tippets completely out of the velvet so it was suggested by a friend that I line them with linen so I did. Project finished this evening...WAALAA!

Wednesday, March 7, 2012

Another Quicky Project

While on a shopping trip in Phily a week or so ago with a friend, we went to an embroidery shop there where I picked up a nice card of Splendor Silk twisted thread in a yellow green. I thought (being a period color made from a local weed called mullen http://www.altnature.com/gallery/mullien.htm) it would make a nice contrasting color to decorate the blue wool hood that I made a couple years ago. Last night I did all the stitching. The pics arent the best but, you get the idea. These quick projects that finish up in a day are quite satisfying.

Monday, March 5, 2012

Quicky Project

So, some time back, it was suggested to me that since I snap pictures like a paparazzi, i should have a badge. After consulting with a Laurel friend of mine (Thank you, Adhemar!), he helped me design something that would be schticky and adorable. Today I worked this embroidery in stranded silk thread on a small piece of white linen. When we were talking about it originally, he said I should find or have made some type of little arched window to put the little embroidered bug in. While I happen to be looking over the clearance rack at Michael's, I came across this little charm. It was perfect (and cheap)! So during my lunch break at work today, and the afternoon break while the kids watched a movie, I embroidered this bug, thus completing my badge.

I give you, The Shutter-bug!


Every paparazzi has to have a press badge, right? *snerk*

Thanks again Adhemar! It's finally done!

Sunday, March 4, 2012

Pay It Forward Gifts

Here is the first of the pay it forward gifts from an F.B. meme. Just basic cross stitch on hand towels.


Onto the next project!

Friday, March 2, 2012

Gift Napkin

I had another bought of helium hand and volunteered to make a napkin for the Gulf Wars gift baskets. I was assigned the King of Caid. His arms are a green sloth hanging. This was not as easy as I anticipated. I have determined I am not as adept at drawing sloths. But, I did it to the best of my ability. Here he is:


Im quite pleased with it.

 Hi!  I have moved my blog to wordpress. After a short I will be shutting this one down.  Here is the link to the new site where i backed up...